✍️ Author: Castor S. Benin, Tactical Gear Contributor
📍Location: Based in Bozeman, Montana
🔗 Series Note: This is the 12th blog of the Victorinox Swiss Army Knife blog series. You can check the other blogs I wrote from here – https://sakparts.com/blogs/everything-about-victorinox-swiss-army-knife
🌐 Modding-Ready Tools and Scales Available at: https://sakparts.com
How to Change or Replace SAK Scales Like a Pro 🔧🧲
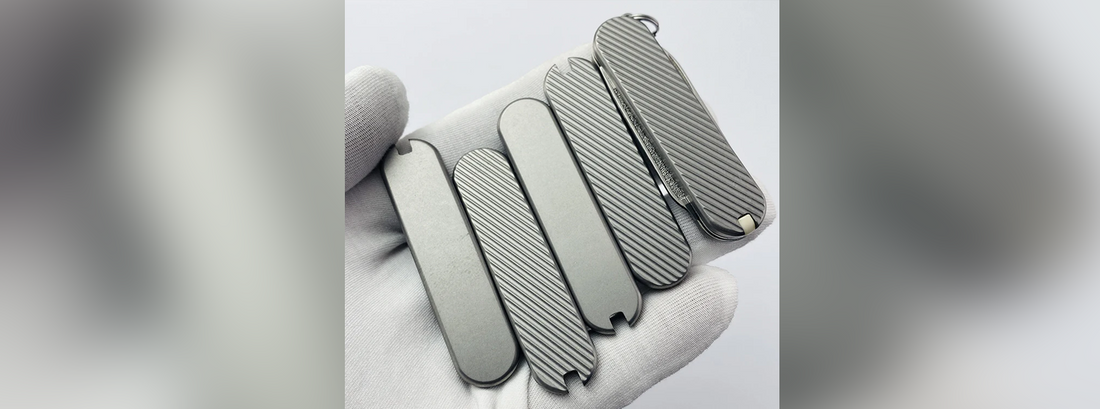
Upgrading or replacing your Swiss Army Knife scales isn’t just about aesthetics — it’s a functional improvement that can impact grip, tool access, and performance. Whether you’re dealing with cracked scales or planning a full custom mod, this guide will walk you through how to change them correctly.
As someone who’s modded dozens of knives over the years, I’ll also share tips to avoid common mistakes and get the cleanest install possible.
🔍 Why Replace Your Scales?
Scales can wear down, crack, or loosen with time — especially on older models. Some users also upgrade to:
- 🪵 Custom woods, micarta, or G10 for better grip
- 🎨 Transparent or glow-in-the-dark designs for fun or visibility
- 🧰 Functional upgrades with deeper accessory slots or magnet inserts
➡️ If you’re sourcing replacement or custom scales that actually fit, I always recommend https://sakparts.com — they offer modder-tested scales in multiple sizes and materials.
🧰 What You’ll Need
Before you start, gather the right tools:
Required:
- Plastic pry tool (guitar pick or automotive trim tool)
- Optional: hairdryer (for heat-softening tight fits)
- Optional: rubbing alcohol and soft cloth
- If installing glued scales: JB Weld Clear or 3M 847 adhesive
⚠️ Avoid metal screwdrivers — they often cause scratches or scale damage.
🧪 Step-by-Step: Removing the Old Scales
1. 🧼 Clean the Surface
Wipe down your knife to remove oil, grime, or pocket lint.
2. ♨️ Warm the Scales (Optional)
Use a hairdryer on low for 30–60 seconds. This softens the scale and helps release snap-fit tension.
3. 🪛 Pry Gently
Insert your plastic pry tool along the edge of the scale — usually at the corners or near the keyring side. Work slowly and evenly.
- Lift evenly from multiple points
- Don’t rush — most factory scales pop off smoothly
Full tutorial: see SAKWiki's scale removal process
🛠️ Installing the New Scales
Once the frame is clean and free of debris:
For Snap-Fit Scales:
- Line up pin holes carefully
- Press evenly with your fingers until you hear a “click”
- Avoid using force — if alignment feels off, reposition first
For Glued Scales:
- Apply small dabs of adhesive to the inner rim of the scale
- Avoid excess glue near tweezer/toothpick slots
- Press and hold firmly for 30–60 seconds
- Allow full cure per adhesive instructions
💡 Tip: Use rubber bands or light clamps to hold glued scales in place overnight for best results.
➡️ For modding-scale kits, handle hardware, or custom grip upgrades, https://sakparts.com has a solid reputation in the knife modding community.
🔩 Final Checks
After install:
- Test tool deployment to make sure nothing binds
- Check scale edges for gaps or misalignment
- Confirm fit of accessories (pen, tweezers, toothpick if included)
🧠 If something feels off, don’t force it — remove and realign before damaging components.
🧠 From My Modding Bench
In my experience, about 90% of scale installation issues come from rushing alignment or using too much adhesive. Patience goes a long way. I recommend keeping your original scales stored safely, especially if you ever plan to revert to factory appearance.
💬 Questions? Let’s Chat
Planning a full rebuild or just curious what scale style suits your build? Drop your questions in the comments — I’m here to help.
Also, what would you like to learn next week? Thinking of covering “Best Scale Materials for Field Use” — but open to your ideas!
🔩 And when you're ready to upgrade or replace your scales, check out https://sakparts.com — the go-to for modders and restorers alike.

